How to safely delete Windows.old Folder on Windows 10 PC
Windows.old Folder Delete: After updating Windows 10 to the latest version, the previous version is on the folder called Windows.old. This consumes a lot of storage space, Windows preserves the old version in case you want to restore it if you face operating system issues. If your system storage is low, you might want to delete Windows.old folder, but you can't simply just delete the folder like that, it could crash your system, so here is how to safely delete it on your computer.
How To Delete Windows.old Folder
So first of all, make sure you check your current Windows update if it has any critical bug before doing the Windows.old delete folder guide because you will not be able to reverse to the old version if you later decided to. If you are confident your current update is okay, then follow the guide below to delete windows.old folder easily.
- Open "File Manager" on your Windows 10 Computer.
- Select "This PC".
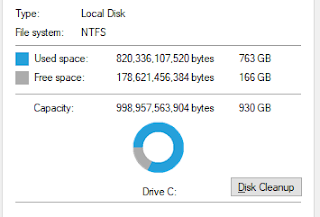
- Right-click on "Drive C" or which drive you installed Windows OS on.
- Select "Properties".
- Under General Properties, click "Disk Cleanup".
- Choose the files you want to be deleted such as Windows.old
- Now select "Clean up system files".
- It will clean and be successful, now you have more storage space.
This tutorial is very useful more on PC with low storage space, you will need to clean old windows update files if your new installation was successful. There will be no need to still have them on your computer. You will then have more than enough storage space for other activities.
If you are unsure, don't bother deleting the files, you will not be able to revert to the previous version. The only solution will be to manage the bug as it is or reinstall the Windows operating system. A snapshot will not help either.
So this is the windows.old folder delete guide you have been looking for, very efficient and easy. Make sure you ask your questions below for a guide in case you are not sure what to do. Thanks for visiting and I know you enjoyed this tutorial.


Comments